
Bitperfect MPD with ALSA for a Linux Audio PC System
Bit-accurate playback is the ultimate solution for a USB-DAC in combination with a HighEndAudio PC. And currently there is no way around Linux. Ideally suited for this is the easy-to-install Linux distribution "Debian" which works without any problems with almost all DAC chips (XMOS, Sabre, Wolfson, TI etc.) and is able to play all high-res formats such as WAV, FLAC, AIFF, ALAC, DSD & DXD, MP3 and Ogg Vorbis.
Below, you’ll find a description of the installation of an audio pc to operate without a graphical user interface but with a real-time kernel for perfect playback with lowest latency using ALSA and the Music Player Daemon (MPD). All this is remotely controlled via an iPhone / iPad / Android device, so that you can use the Linux audio server without keyboard, mouse and monitor.
We highly recommend Debian Stretch which is excellent for the setup of a bit-perfect audio PC and you can play native DSD files with this setup.
The setup of the BIOS of your Audio PC is described under BIOS Setup for Audio PC.
For best results hardware platforms based on Intels Atom processor are highly recommended for bitperfect highend playback.
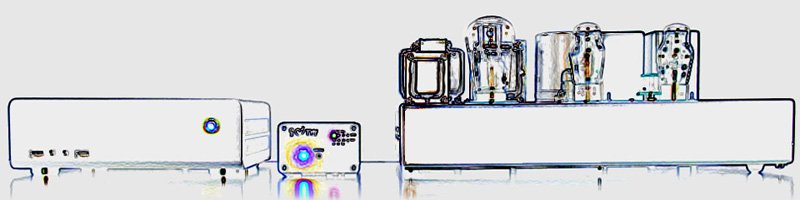
Get yours: Hifi Music Server for Sale.
A) Installing Debian Linux and the Music Player Demon (MPD)
1) Downloading Debian Linux
We will be using the "
netinst CD image" during which the most current files will be downloaded from the Internet as required. We recommend that before installation you load the most recent
firmware package and copy the files in the folder "firmware" to the medium on which it will be installed so that you will have all the necessary drivers for your hardware (
learn more).
Load the
Universal USB Installer if you want to install Debian from a USB memory stick. This software allows you to easily create bootable USB installation media with the downloaded Debian ISO files.
2) Installing Debian "Stretch" (Debian 9)
Connect your USB DAC to the PC and then to the Internet. Boot your system using the installation medium that you prepared and then proceed as follows
- At the Installation Screen "Advanced Options" select "Expert Install"
- In "Choose Language" select the language of your choice and the "base locale settings"
- Select the keyboard layout
- Even if you are installing from a USB thumb drive, select "Detect and mount CD-ROM"
- Select option "Load Installer components from CD" - leave all empty. Go to the next step with "Continue"
- Next, your network is detected and the automatic installation of the network "Detecting network hardware" / "Configure the network" follows - with DHCP based networks you can select "Auto-configure networking"
- The hostname - in this example - "debianmusic" is set, the domain name can usually be left empty
- "Set up users and passwords" lets you install the users (recommended: "shadow passwords"). Do not allow "Always login as root"
- After the "root" is set up a "Normal User Account" is created. In this example we use the user "usbaudio"
- At the prompt "Set the clock using NTP" answer with "no", you should then select your "time zone" manually
- "Detect Disks" will detect the hard disk and "Partition disks" initiates the partitioning of the hard disk. It's easiest if you use the prompted partitioning procedure and then to specify to use the whole hard disk. Partitioning will then proceed to place all files on a single partition which in the list should be selected as the primary partition ("#1 primary") and the file system set to "ext4" and set the "Boot-Flag" to "on". Format partition, changed to "Format the partition: yes, format it", other options should be left as is. Complete with "Done setting up the partition" & "Finish partitioning and write changes to disk"
- "Install the base system" - the basic system will now be installed
- For the Kernel with 64-bit systems, choose the preselected "linux-image-amd64"-Kernel
- For the selection of drivers, you need only choose the drivers needed for the system ("only include drivers needed for this system")
- If asked for "Non-Free and/or Contrib"-Software choose "no", for"APT" choose "yes"
- "Configure the package manager" is used to set a download mirror for additional software packages, it's best to look for a server locally in your own country. The "Security" and "Release Updates" can be deactivated in the following step
- Next is software selection and installation ("Select and install software")
- "man" and "mandb" program can be omitted
- The software selection should be kept to "Standard System Utilities"
- The GRUB bootloader is installed in the Master Boot Sector (MBR) ("Install the GRUB bootloader to a hard disk", maybe you have to choose the particular harddisk here - usualy "/dev/sda1"). If asked for "EFI" select "No" (except you do have an EFI based system) and then acknowledge with" Finish the installation" and boot the installed Debian system. If GRUB is not working you can try the LILO Bootmanager
3) Installing the Real Time Kernel
The real-time kernel provides minimal latency, which is of greater significance for audio recordings but also has an effect on the reproduction of audio files over USB.
To proceed, log in as "root" and then enter the following commands:
sudo apt-get update
sudo apt-get install linux-image-rt-amd64
Reboot your system after entering the commands. You will then get a menu of options with the installed kernels and after short pause Debian will automatically start with the real-time kernel. You can check this using the following console command:
sudo uname -a
You should then get the following output ("RT" means "Real Time"):
usbaudio@debianmusic:~$ uname -a
Linux debianmusic 4.9.0-11-rt-amd64 #1 SMP PREEMPT RT Debian 4.9.189-3 (2019-09-02) x86_64 GNU/Linux
4) Installing and configuring ALSA
ALSA (Advanced Linux Sound Architecture) is a free sound architecture for Linux systems and controls the USB DACs. You install ALSA with the following command
sudo apt-get install alsa-utils alsa-tools
Edit the file "/etc/security/limits.conf" and add the following lines:
@audio - rtprio 99
@audio - memlock unlimited
@audio - nice -10
5) Installing MPD
MPD (Music Player Daemon) is the actual music server and is installed as follows:
sudo apt-get install mpd
Now assign "mpd" to the group "audio":
sudo adduser mpd audio
Make the directory for your music- and playlist-files
sudo mkdir /home/usbaudio/share /home/usbaudio/share/music /home/usbaudio/share/playlist
The write permission should be set as follows:
sudo chmod 777 /home/usbaudio/share /home/usbaudio/share/music /home/usbaudio/share/playlist
6) Installing and configuring SAMBA
You also need Samba to access music files on Windows computers and load them into the Debian audio server:
sudo apt-get install samba samba-common
Create user "usbaudio" for access over the Windows network:
sudo smbpasswd -a usbaudio
Edit the file "/etc/samba/smb.conf" and add the following:
[music]
	path = /home/usbaudio/share/music
	writeable = yes
;	browseable = yes
	guest ok = yes
	comment = debianmusic
	wins support = yes

[playlist]
	path = /home/usbaudio/share/playlist
	writeable = yes
;	browseable = yes
	guest ok = yes
	comment = debianmusic
	wins support = yes
You can uncomment sections "#[printers]" and "#[print$]" with "#".
Test if the Samba configuration is ok:
sudo testparm /etc/samba/smb.conf
7) Installing SSH
If you subsequently want to access the music server from another computer via Telnet/SSH client to change the configuration or for testing purposes, you will need the open SSH server. Install this with:
sudo apt-get install openssh-server
8) Installing and configuring LIGHTTPD
So that you can later display the covers when using mobile remote clients or install the webfrontend
Rompr, you will need a web server. The small web server lighttpd is best suited for this and is installed using the following command:
sudo apt-get install lighttpd
After installing lighttpd you must adjust in "/etc/lighttpd/lighttpd.conf" the following line corresponding to the folder which is above the folder in which the music files are located:
server.document-root = "/home/usbaudio/share"
and below this enter the following:
dir-listing.activate = "enable"
to enable directory browing.
9) Set up DHCP or static IP address
Static IP-Address:
We recommend that under Debian you deactivate DHCP and use a static IP address instead. You can specify this in the file"/etc/network/interfaces" so that you can later easily access the shared folder with Windows Explorer (in our example "\\192.168.1.151").
# The primary network interface
allow-hotplug eth0
#iface eth0 inet dhcp
iface eth0 inet static
address 192.168.1.151
netmask 255.255.255.0
gateway 192.168.1.254
DHCP:
To use DHCP, "/etc/network/interfaces" should be as follows:
# The primary network interface
allow-hotplug eth0
iface eth0 inet dhcp
#iface eth0 inet static
#address 192.168.1.151
#netmask 255.255.255.0
#gateway 192.168.1.254
The file "/etc/dhcp/dhclient.conf" should also be edited for the Mac address (= dhcp-client-identifier) and host name (= send host-name):
send host-name = "debianmusic";
#send host-name = gethostname();
send dhcp-client-identifier 00:11:22:33:44:55;
You can get the Mac address (= dhcp-client-identifier) using the following command:
sudo ip addr see ("link/ether")
Use "\\debianmusic" to access the shared folder in Windows (this works with DHCP and Static IP-Address configuration!).
10) Installing and configuring AVAHI
Install the Avahi Daemon with the command:
sudo apt-get install avahi-daemon
so that your remote clients are able to find your mpd-server.
After installing avahi-daemon edit "/etc/avahi/avahi-daemon.conf" and delete "#" in the line:
enable-dbus=yes
11) Installing and configuring ACPID
If your USB-Audio-Server does not shut down when pressing the power-button you have to do this:
sudo apt-get install acpi acpid
After that create the file "/etc/acpi/powerbtn.sh" and add these two lines:
/sbin/shutdown -h now "Power button pressed"
exit 0
12) Finishing the installation and rebooting
You are now finished with all the required steps for configuring the USB audio server. You can now restart the system with the console command sudo reboot and then continue with configuring the Bitperfect MPD (Music Player Daemon).
Before continuing, you can also update your system to the newest version:
sudo apt-get update
sudo apt-get upgrade
B) Configuring the Music Player Daemons for bit-accurate reproduction through a USB DAC (D/A Converter)
1) Check the USB D/A converter
Connect the USB DAC and use the console to check the converter connections:
sudo aplay --list-devices
This is important both for the configuration of the music player daemons as well as the assignment of the DA converter as the default audio unit.
You should get something like the following output after entering "aplay" (Example used with the Firestone I Love Taiwan DA converter):
usbaudio@debianmusic:~$ sudo aplay --list-devices
**** List of Devices (PLAYBACK) ****
Card 1: TW [I Love TW], Device 0: USB Audio [USB Audio]
  Sub-Device: 0/1
  Sub-Device #0: subdevice #0
Based on the displayed values, the file "/usr/share/alsa/alsa.conf" must be adapted accordingly and, for example, "0" replaced by "1" if "Card 1" instead of "Card 0"
The file should modified :
defaults.ctl.card 1
defaults.pcm.card 1
defaults.pcm.device 1
The installed soundcards can be displayed with the following command:
sudo cat /proc/asound/cards
 1 [TW             ]: USB-Audio - I Love TW
                      Firestone Audio Co., Ltd. I Love TW at usb-0000:00:1d.7-7, high speed
2) Configuring the Music Player Daemon (MPD)
The most important factor here is MPD configuration file "/etc/mpd.conf". This file contains various options, those that are not required and others that need to be enabled. An example for this is the configuration for "debianmusic" which will take the user that is installed in usbaudio and the hardware read in as for
sudo aplay --list-devices. The only thing changed for the folders is the "music_directory" and the "playlist_directory".
# Files and directories #######################################################
music_directory         "/home/usbaudio/share/music"
playlist_directory      "/home/usbaudio/share/playlist"
db_file                 "/var/lib/mpd/tag_cache"
log_file                "/var/log/mpd/mpd.log"
pid_file                "/var/run/mpd/pid"
state_file              "/var/lib/mpd/state"
sticker_file            "/var/lib/mpd/sticker.sql"
# General music daemon options ################################################
user                            "mpd"
group                          	"audio"
# For network
#bind_to_address                "localhost"
port                            "6600"
auto_update     				"yes"
# Symbolic link behavior ######################################################
follow_outside_symlinks        "yes"
follow_inside_symlinks        "yes"
# Zeroconf / Avahi Service Discovery ##########################################
zeroconf_enabled               "yes"
zeroconf_name                  "debianmusic"
# Input #######################################################################
#input {
#       plugin "curl"
#       proxy "proxy.isp.com:8080"
#       proxy_user "user"
#       proxy_password "password"
#}
# Audio Output ################################################################
audio_output {
        type            "alsa"
        name            "My ALSA Device"
        device          "hw:1,0"        # optional
        mixer_type      "disabled"      # optional
#       mixer_device    "default"       # optional
#       mixer_control   "PCM"           # optional
#       mixer_index     "0"             # optional
}
# Character Encoding ##########################################################
filesystem_charset              "UTF-8"
id3v1_encoding                  "UTF-8"
###############################################################################
3) Testing for bit-accurate reproduction via USB
If you don't own a DAC that displays the bit/sample rate, you can get the correct bit-accurate reproduction directly using the terminal when playing a song:
sudo cat /proc/asound/card0/pcm0p/sub0/hw_params
This should look like the following with a 24 bit / 176 kHz file:
usbaudio@debianmusic:~$ sudo cat /proc/asound/card1/pcm0p/sub0/hw_params
access: RW_INTERLEAVED
format: S24_3LE
subformat: STD
channels: 2
rate: 176400 (176400/1)
period_size: 22050
buffer_size: 88200
Note, that you should replace "card1" with your own hardware using sudo aplay --list-devices.
C) Initial Startup
- Connect your USB-DAC with the USB-Music-Server
- Connect your network-cable to the USB-Music-Server
Depending on your network configuration it is recommended to setup your router as DHCP-Server
- Turn on your DAC
The DAC has to be turned on before the USB-Music-Server
- Turn on the USB-Music-Server
- Copy your Music on the USB-Music-Server
If you are using Windows you can connect with the Explorer using "\\debianmusic"
- Setup Remote Access (check out topic E)
MPDluxe or yaMPC for iOS based mobile devices
Install the MPDluxe app and go to "Settings / Connection / Host name/address" and type in: "debianmusic.local" or the IP-address of your US audio server. Leave port "6600" untouched, no need to set up a password.
M.A.L.P. for Android based mobile devices
Quite easy to setup: When starting M.A.L.P. the first time choose your network-connection-mode (if you are in your local network use "WLAN"). Than enter your IP-address in "Host" (take care to setup MPDroid only with the IP-address, not the hostname - if you do not know your IP address download the tool "Fing" from the Play Store and scan your network) - all other options can be left as is.
sevenMPC for Windows Mobile
Simple and self-explanatory is sevenMPC for mobile phones based on Windows.
E) Remote Access to MPD (for desktop)
Auremo for Windows
Auremo is a very good choice to easily access the Music Player Demon from Windows computers . After installation you only need to add the IP address of the music server under "Settings/Servername or address, in this case "192.168.1.151", or "debianmusic". "Enable volume slider" is disabled which in any case would not work in the bit-perfect configuration described above. Use "Apply and save settings" to save the setup and, if everything is set up right, Auremo will immediately access the MPD server. Auremo requires Microsoft .NET Framework.
GMPC for Linux
GMPC can be used as graphic front end for MPD on a Linux system to provide a graphical user interface. It's easy to install with the Package manager of the Linux desktop or through Terminal with:
sudo apt-get install gmpc.
Cantata for Mac OS X
For Mac OS X users,
Cantata is one of the best graphical clients for the Music Player Daemon with a lot of features and is very customizable.
Notes
Previous Knowledge
Some basic knowledge of Linux is advantageous. The use of editors such Nano or VIM should not present any difficulty when working via the console.
Security Note
The above described configuration is meant to enable a Debian server to play bit-accurate music over USB in best-possible quality. Login via "root" is not provided for the configuration above. The standard user with "sudo" as root is used here. We make no provisions for network security in this configuration. You should take appropriate care when using this Debian Music Server configuration over the Internet.